How to use the Programme Editor
The Programme Editor allows you to edit multiple exercises from one convenient workspace. You can apply the same prescription fields to several exercises at once, update individual exercises, rearrange their order and edit any information sheets included in your programme.
This can greatly reduce the time required to create a rehabilitation programme, particularly when several exercises share the same number of sets, repetitions, frequency or other prescription details.
To use the Programme Editor, follow these simple steps:
1. Add exercises to your programme
Search for the exercises you require and add them to the PROGRAMME CONTENTS column on the right side of the screen.
You can add an exercise by clicking its green ADD EXERCISE TO PROGRAMME icon. On a desktop computer, you can also drag the exercise directly into the PROGRAMME CONTENTS column.
Repeat this process until you have added all the exercises and information sheets you would like to include.
2. Open the Programme Editor
At the top of the PROGRAMME CONTENTS column, click the EXPAND PROGRAMME EDITOR button.
This expands the Programme Contents area and displays the Programme Editor.

Click the Expand Programme Editor button to open the Programme Editor.
The workspace contains three main areas:
1. BULK PRESCRIPTION FIELDS, where you can prepare information to apply to multiple exercises.
2. EXERCISES IN THIS PROGRAMME, where you can select, edit and rearrange exercises.
3. INFORMATION SHEETS, where you can edit any information sheets included in the programme.
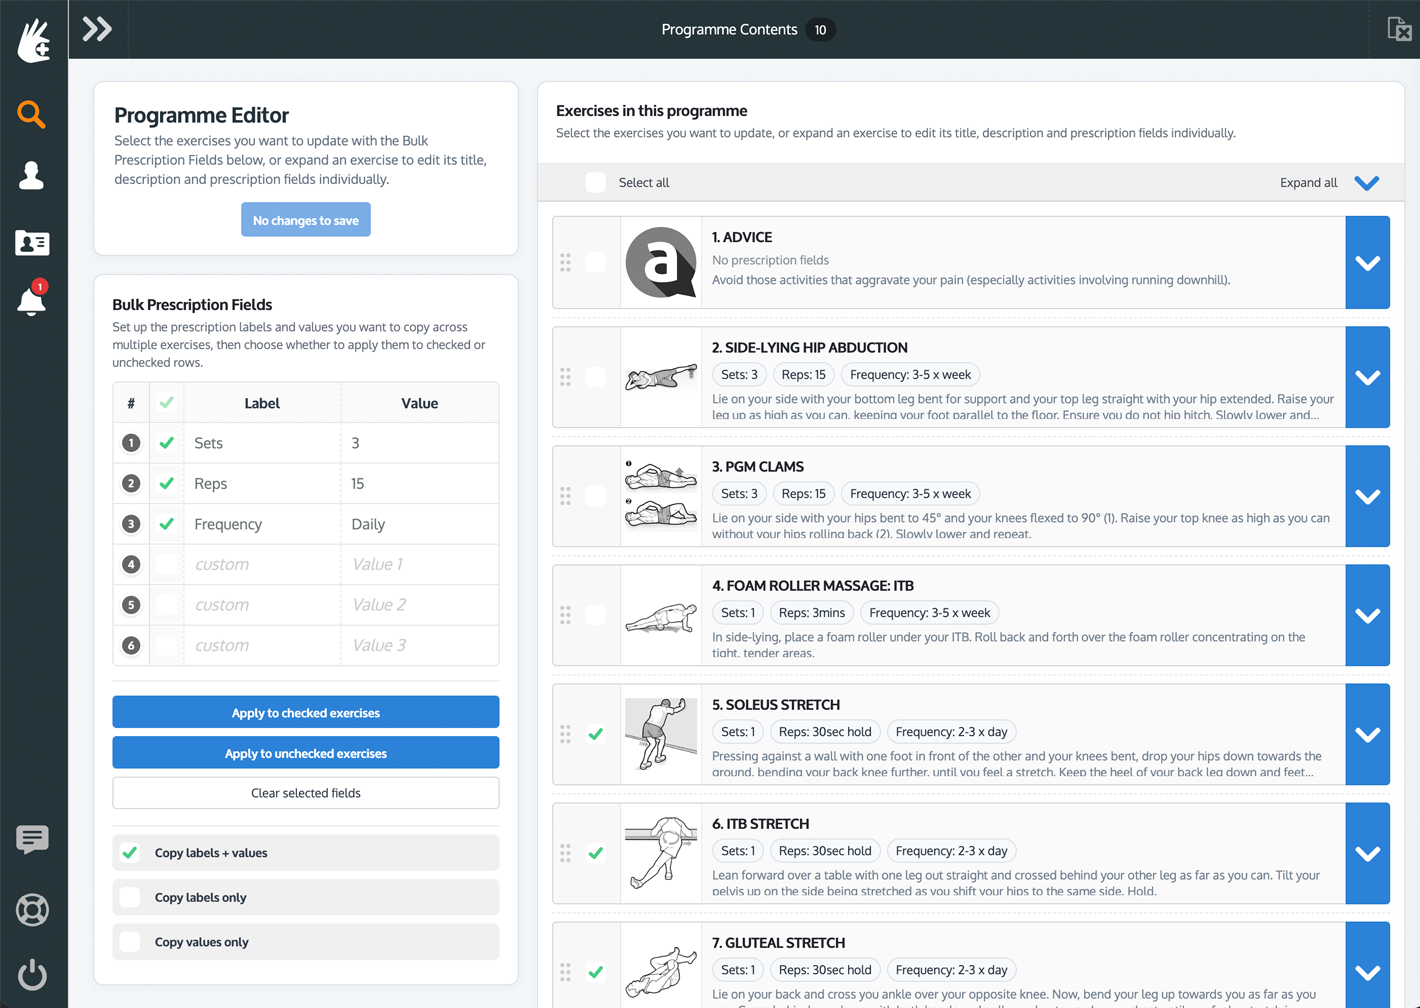
The Programme Editor displays the Bulk Prescription Fields, Exercises in this programme and Information sheets areas.
3. Understanding prescription fields
Each prescription field consists of two parts:
• Label: This describes the type of instruction, such as Sets, Reps, Load, RPE or Rest, etc
• Value: This contains the instruction prescribed to your client, such as 3, 10, 15 kg, 7/10 or 60 seconds.
The first three prescription fields are provided for:
• Sets
• Reps
•Frequency
A further three custom fields are available. These can be used for Load, RPE and Rest, or for any other information appropriate to the exercise.
For example:
• Load: 15 kg
• RPE: 7/10
• Rest: 60 seconds
Because the labels are editable, you may also use these fields for instructions such as Hold, Tempo, Duration, Distance, Resistance or Pain Limit.
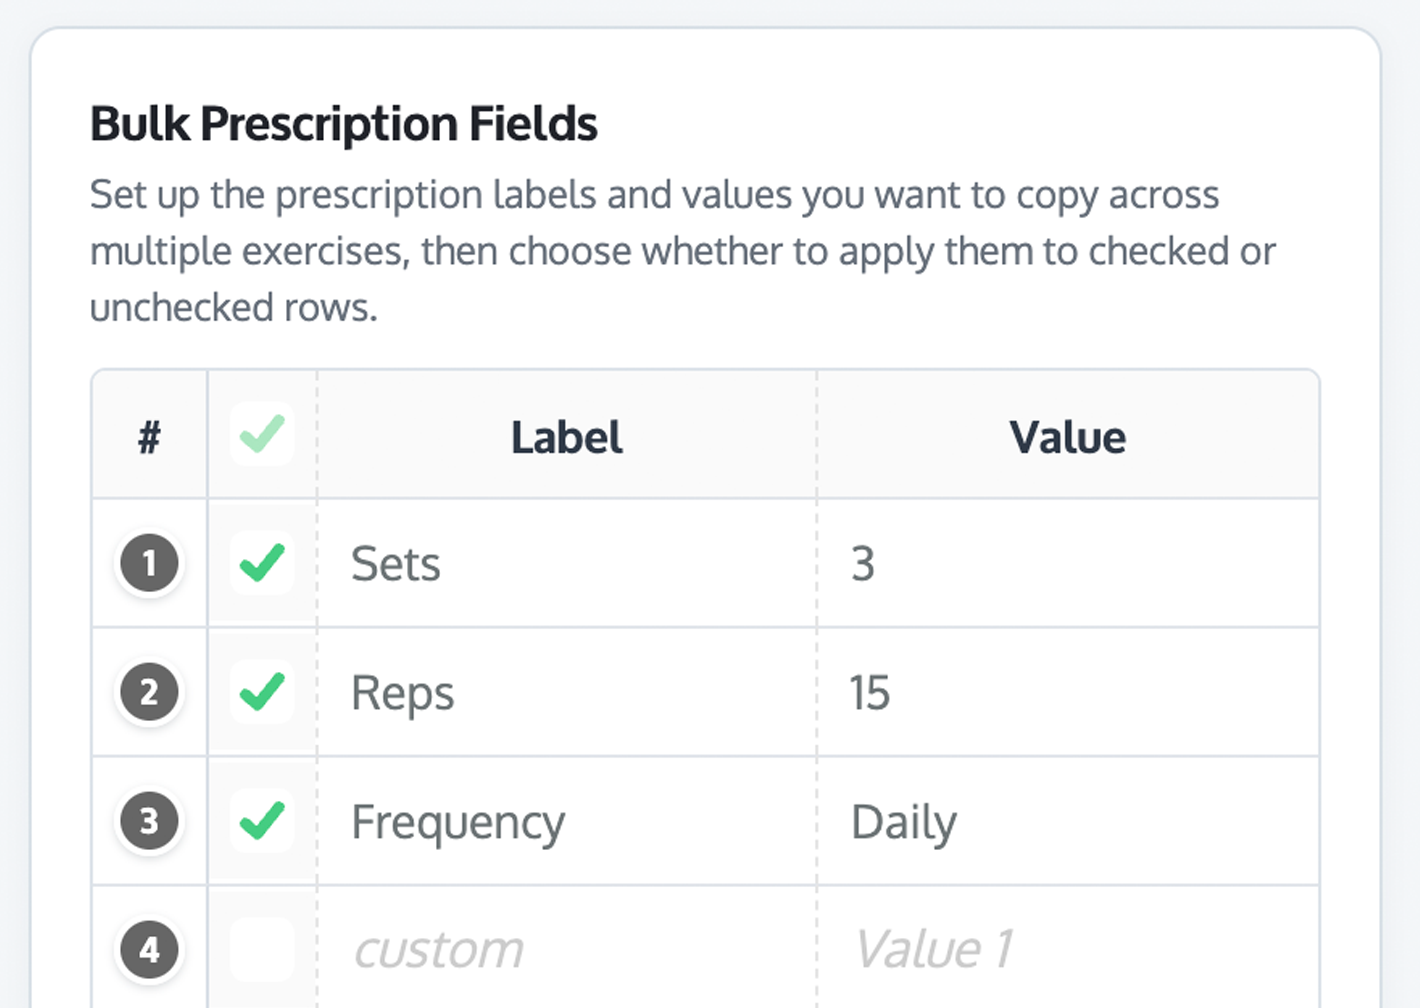
Enter a label and value for each prescription field you want to use.
Only fields containing useful prescription information need to be included. Custom fields without a label are omitted from the programme.
If you enter a custom label without a value, the label can be displayed as a blank field in the exercise diary. This can be useful when you want the client to record their own result.
4. Select the prescription fields you want to apply
A selection box is displayed beside each row in the BULK PRESCRIPTION FIELDS section.
Select the fields you want to copy to other exercises and deselect any fields you do not want to change.
For example, if you want to update Sets, Reps and Rest without changing Frequency, select:
• Sets
• Reps
• Rest
Leave Frequency unselected.
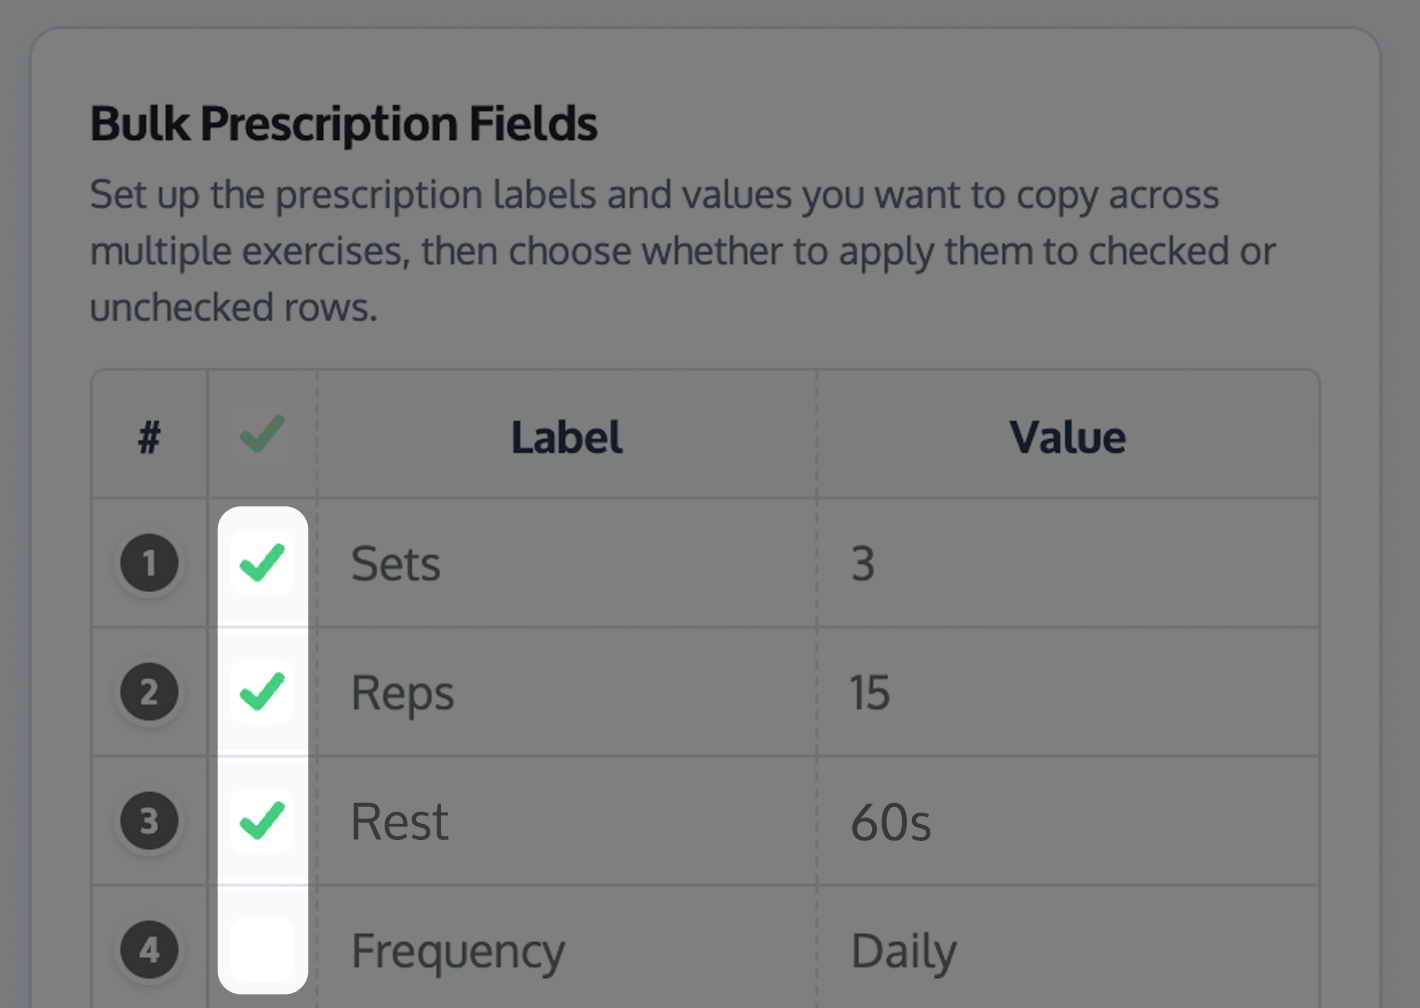
Select the prescription fields you want to apply to the exercises.
This allows you to update only the required information while preserving the existing details in all other fields.
You can use the selection box at the top of the field list to select or deselect all prescription fields.
Important: The field selection boxes control which prescription fields will be copied. The exercise selection boxes further down the page control which exercises will receive those fields.
5. Enter the information you want to apply
Enter the required labels and values into the BULK PRESCRIPTION FIELDS section.
For example:
• Sets: 3
• Reps: 10
• Frequency: Daily
• Load: 15 kg
• RPE: 7/10
• Rest: 60 seconds
This information acts as the source for your bulk changes. It is not applied to the exercises until you click one of the APPLY buttons.
6. Choose how labels and values are copied
The COPY options determine which part of each selected prescription field will be applied:
• Copy labels + values: Copies both the label and its corresponding value.
• Copy labels only: Changes the labels without changing the exercises’ existing values.
• Copy values only: Changes the values without altering the existing labels.
• COPY LABELS + VALUES is the most suitable option when you want the selected exercises to use identical prescription information.
• COPY LABELS ONLY is useful when standardising terminology. For example, you could change “Resistance” to “Load” while retaining the different resistance value prescribed for each exercise.
• COPY VALUES ONLY is useful when exercises already have the correct labels but require updated values.
Note: When using COPY VALUES ONLY, values are copied into their corresponding field positions. Check that the fields have the intended labels before applying your changes.
7. Select the exercises you want to update
Each exercise in the EXERCISES IN THIS PROGRAMME section has its own selection box.
Select the exercises you want to update. Deselect any exercise that should retain its current prescription details.
Use SELECT ALL or DESELECT ALL to quickly change the selection state of every exercise.
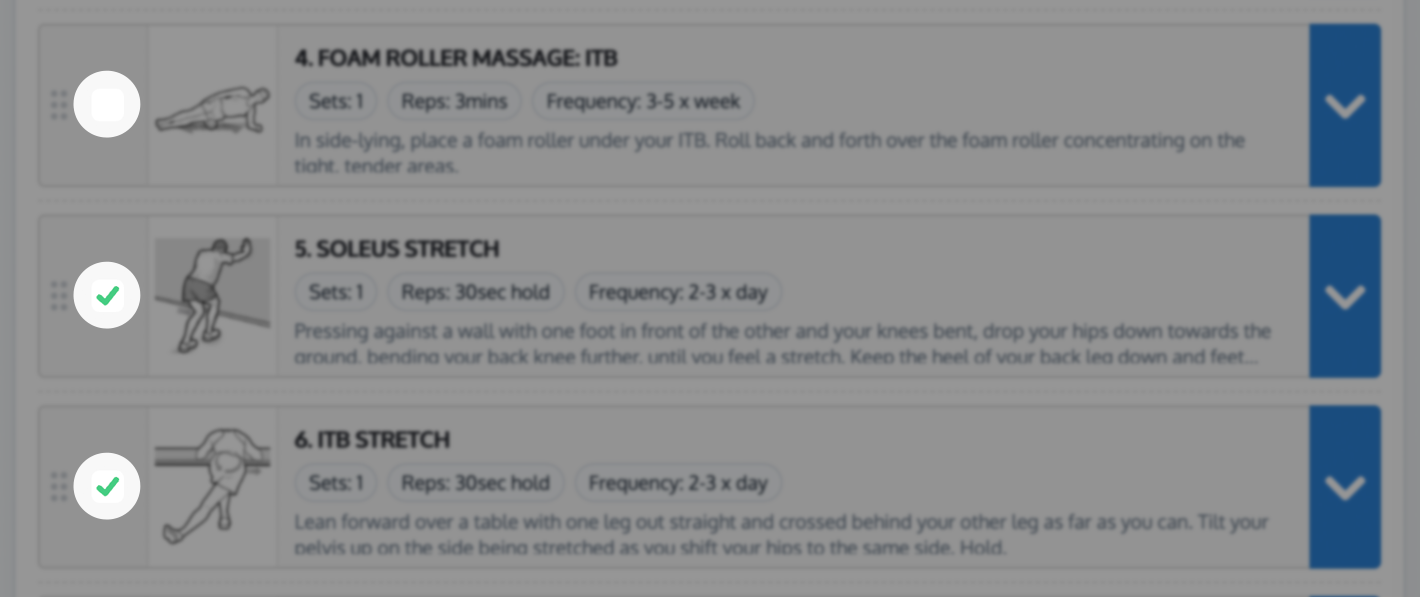
Select only the exercises that should receive your bulk changes.
This makes it easy to create different groups within the same programme. For example, you could apply one prescription to strengthening exercises and another to mobility exercises.
8. Apply the prescription fields
Once you have selected the required prescription fields and exercises, click one of the following buttons:
APPLY TO CHECKED EXERCISES applies the selected fields to exercises containing a check mark.
APPLY TO UNCHECKED EXERCISES applies the selected fields to exercises without a check mark.
The APPLY TO UNCHECKED EXERCISES option is particularly useful when your programme contains two groups. You can configure one group first, then apply a different prescription to all remaining exercises without reversing every selection.
After applying the fields, review the prescription information displayed on each exercise row.
Important: Applying fields updates the exercises inside the editor, but the changes are not permanently saved until you click SAVE CHANGES.
9. Clear selected prescription fields
The CLEAR SELECTED FIELDS button clears the information currently entered in the selected rows of the BULK PRESCRIPTION FIELDS section.
It does not immediately remove information from your exercises.
To remove selected prescription information from several exercises:
1. Select the required prescription fields.
2. Click CLEAR SELECTED FIELDS.
3. Choose the appropriate copy option.
4. Select the exercises you want to update.
5. Click APPLY TO CHECKED EXERCISES or APPLY TO UNCHECKED EXERCISES.
6. Click SAVE CHANGES.
10. Edit an individual exercise
You can also edit each exercise individually from within the Programme Editor.
Click the chevron at the end of an exercise row to expand its full editor.
You can then change:
• Exercise title
• Exercise description
• Prescription field labels
• Prescription field values
This is useful when most exercises share the same prescription, but one or two require different instructions.
For example, you could first apply “3 sets of 10 repetitions” to every strengthening exercise, then expand one exercise and change it to “3 sets of 8 repetitions”.
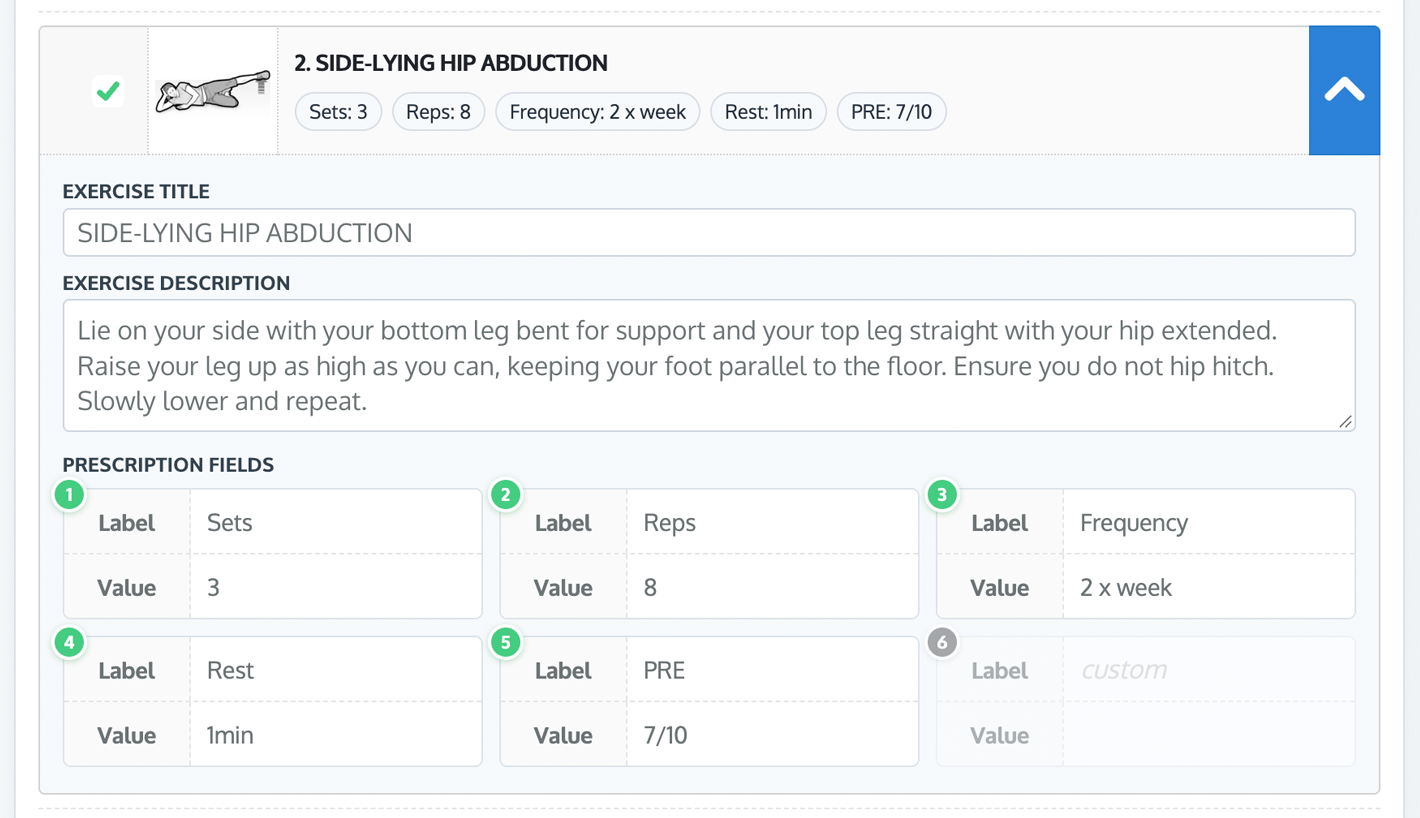
Expand an exercise to edit all its details individually
Use EXPAND ALL when you want to view every exercise editor at once. Select COLLAPSE ALL to return to the compact exercise list.
11. Rearrange exercises
To change the order of the exercises, use the drag handle beside an exercise and move it to the desired position.
The order displayed in the Programme Editor is the order in which the exercises will appear on the completed programme.
This allows you to group exercises by stage, body region, equipment or the order in which you want your client to perform them.
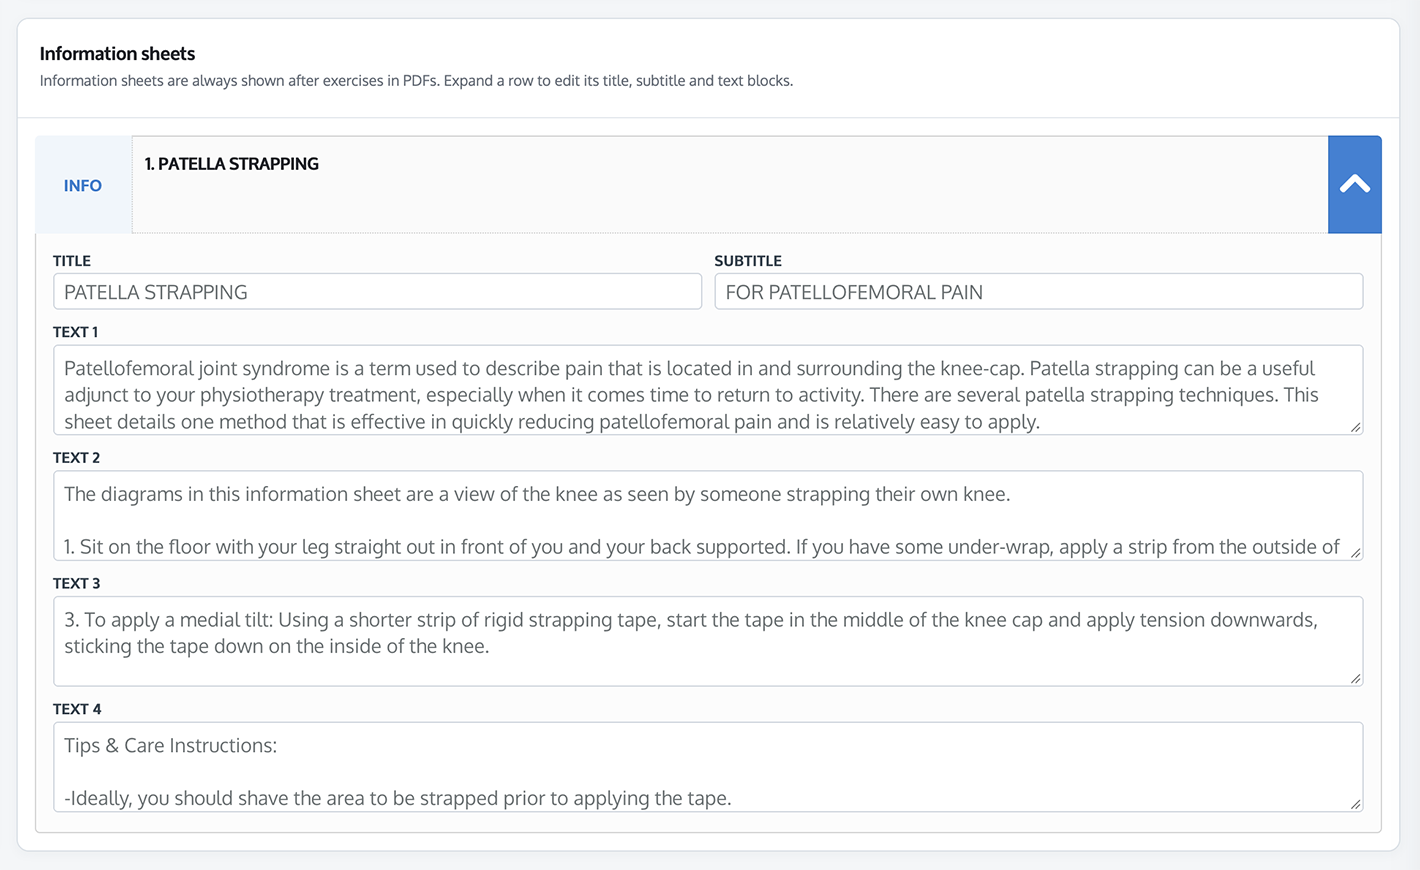
12. Edit information sheets
Information sheets included in your programme are displayed in the INFORMATION SHEETS section.
Expand an information sheet to edit its:
• Title
• Subtitle
• Text blocks
Information sheets are displayed after the exercises in the completed PDF programme.
13. Save your changes
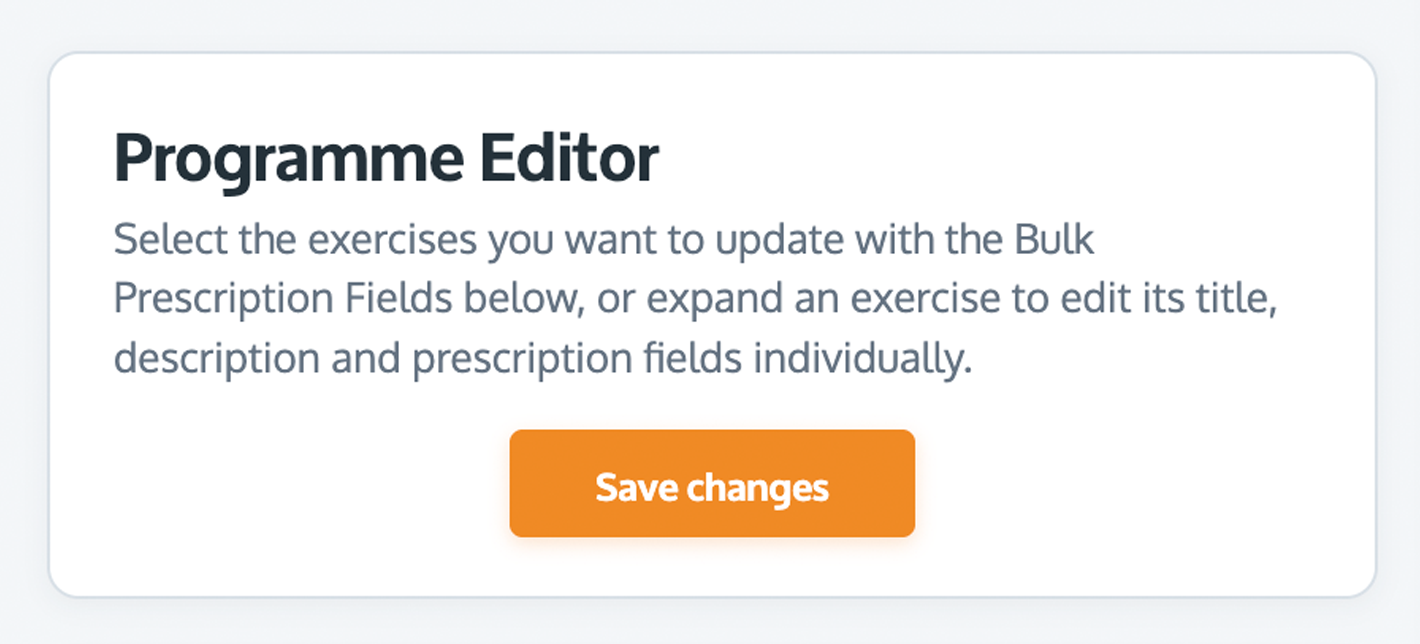
Once you are happy with the exercise details, prescription fields and exercise order, click SAVE CHANGES at the top of the Programme Editor.
A CHANGES SAVED message appears once your changes have been saved successfully.
If the SAVE CHANGES button displays NO CHANGES TO SAVE, all current changes have already been saved.
Important: If you collapse the Programme Editor or leave the page before saving, your unsaved changes may be lost. A warning is displayed if you try to do this with unsaved changes.
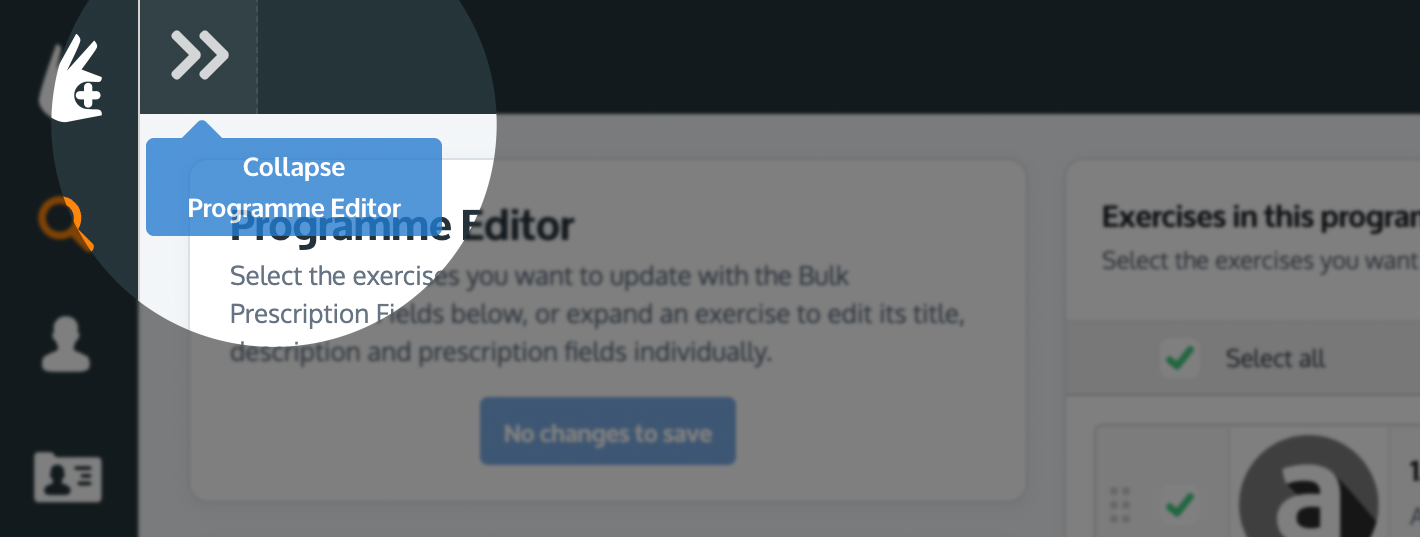
14. Close the Programme Editor
After your changes have been saved, click the double-chevron COLLAPSE PROGRAMME EDITOR button at the top-left of the Programme Editor.
This closes the Programme Editor and returns you to the PROGRAMME CONTENTS column. Your saved changes remain in the programme, ready for you to create the PDF, e-mail it to your client or save it as a custom programme.
A helpful example
Imagine your programme contains six exercises:
• Four strengthening exercises
• Two stretching exercises
You want the strengthening exercises prescribed as:
• Sets: 3
• Reps: 10
• Frequency: 3 times per week
• RPE: 7/10
• Rest: 60 seconds
Select the four strengthening exercises, enter the details into the BULK PRESCRIPTION FIELDS section and click APPLY TO CHECKED EXERCISES.
Next, deselect those exercises and select the two stretching exercises. Change the bulk fields to:
• Sets: 2
• Reps: 3
• Frequency: Daily
• Hold: 30 seconds
Apply these fields to the selected stretching exercises, review the results and click SAVE CHANGES.
You have now configured all six exercises without opening and editing each exercise separately.
Tips for using the Programme Editor
• Apply common information in bulk first, then make any exercise-specific changes.
• Select only the source fields you want to change.
• Review the exercise selection before clicking an APPLY button.
• Use COPY VALUES ONLY carefully when exercises have different custom labels.
• Use editable labels to make instructions clearer for your client.
• Remember to click SAVE CHANGES before closing or collapsing the editor.
• Review the final PDF to ensure your prescription information is displayed as intended.
Now you’re ready to create your programme
Once your changes have been saved, collapse the Programme Editor to return to the PROGRAMME CONTENTS column.
You can then create your programme as a PDF document, e-mail it directly to your client or save it to your database of custom programmes.
To learn more about searching, editing and deleting custom information sheets, click the appropriate link below:
Searching for information sheets
Uploading an information sheet
Editing a custom information sheet
Deleting a custom information sheet