How to create a custom programme
You can create your own database of custom programmes that you can re-use and edit in the future. You can create these from scratch, or use a pre-set rehabilitation programme found in The Rehab Lab programme database.
Your custom programme can be made up of exercises and information sheets from The Rehab Lab database or your own uploaded exercises and information sheets, complete with your own images. To create a custom programme, follow these simple steps:
1. Login to The Rehab Lab
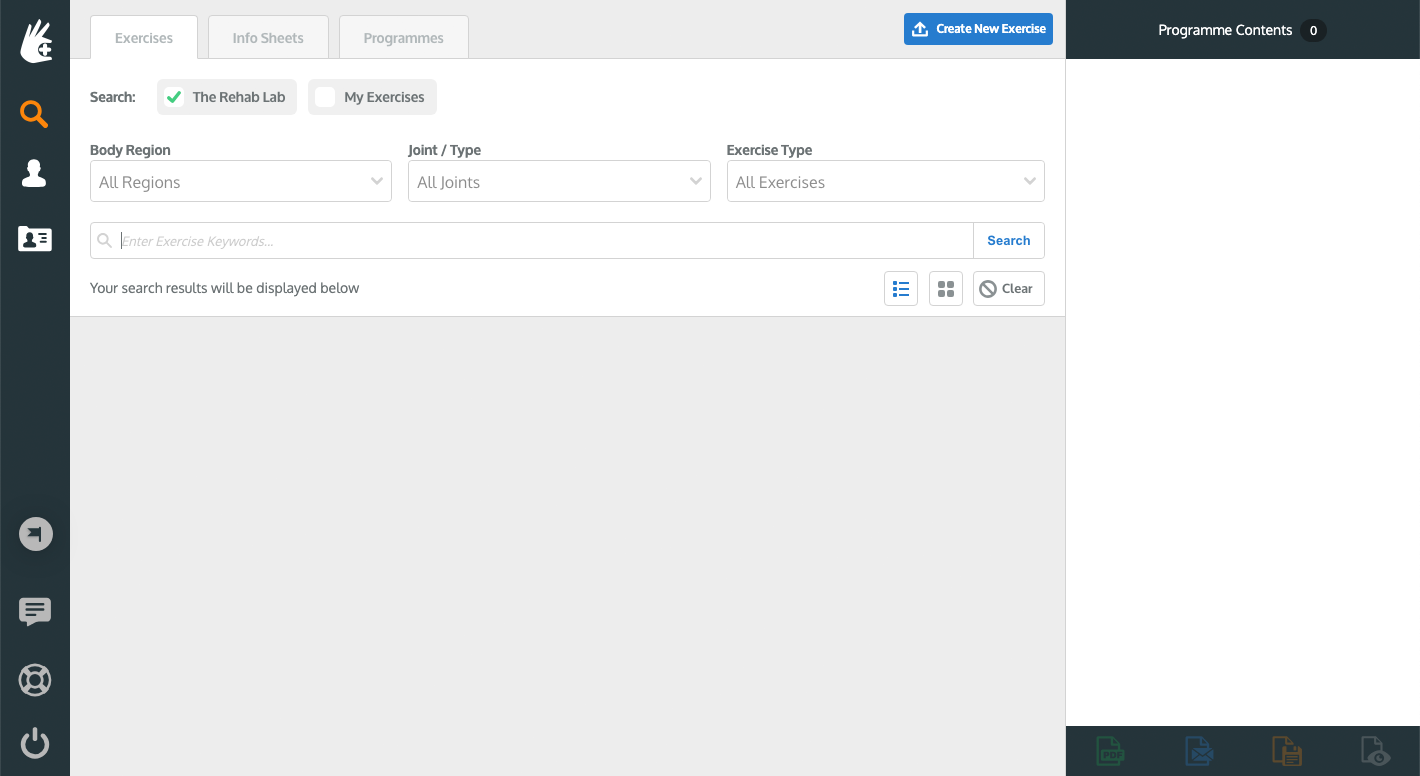
Go to The Rehab Lab login screen and enter your username and password. After clicking the 'LOGIN TO THE REHAB LAB' button The Rehab Lab's main screen will open. This is the EXERCISE SEARCH screen.

2. Search for exercises to add to your new custom programme
Use the various search options to find the exercises (and custom exercises) that you would like to add to your custom programme. You can read our how-to-guide on ‘searching for exercises’ for an in-depth explanation on utilising the exercise search options to your advantage and refining your search to limit the number of exercises that appear in the exercise search results area:
HOW-TO-GUIDE: Searching for exercises
3. Add your exercises to your programme
The number of exercises retrieved in your search is displayed below the keyword input. All the exercises that match your search criteria will be displayed in the search results area. Each exercise is displayed as an 'EXERCISE TILE'.
The EXERCISE TILE displays a thumbnail preview of the exercise image, the exercise title, the exercise type (stretching & mobilising, strengthening & stabilising or neural and 'other'), an excerpt of the exercise description and three action buttons. These buttons are:

1. DELETE EXERCISE for removing the exercise from your custom exercise database (this button is only enabled if the exercise is one of your custom exercises)
2. PREVIEW EXERCISE (this opens the PREVIEW EXERCISE window where you can see a larger view of the image, the full exercise description and more information about the exercise)
3. ADD EXERCISE TO PROGRAMME button (this adds the exercise to the PROGRAMME CONTENTS COLUMN on the right side of the screen).
To add your desired exercise to your new programme, click the green ADD EXERCISE TO PROGRAMME button (the green plus ('+') icon), or on a desktop computer, simply drag the exercise into the PROGRAMME CONTENTS COLUMN on the right of the screen.
To preview an exercise, click the blue 'PREVIEW EXERCISE' button (the middle icon).
Once your exercise has been added to the PROGRAMME CONTENTS COLUMN on the right of the screen, you can now edit the exercise to your liking.
4. Add more exercises
Repeat steps 2 and 3 until you have added all the exercises you desire.
5. Search for information sheets to add to your new custom programme
Find the information sheets (and custom information sheets) that you would like to add to your custom programme. Our how-to-guide on ‘searching for information sheets’ explains the process of searching for information sheets in more detail:
HOW-TO-GUIDE: Searching for information sheets
6. Add the info sheet to your programme
To add your desired information sheet to the programme contents column, click the ADD INFO SHEET TO PROGRAMME button (the green plus (+) icon in the ACTIONS column), or, on a desktop computer, simply drag the table-row into the PROGRAMME CONTENTS COLUMN on the right of the screen.

7. Add more information sheets
Repeat steps 5 and 6 until you have added all the information sheets you desire.
8. Make changes to each item in your programme
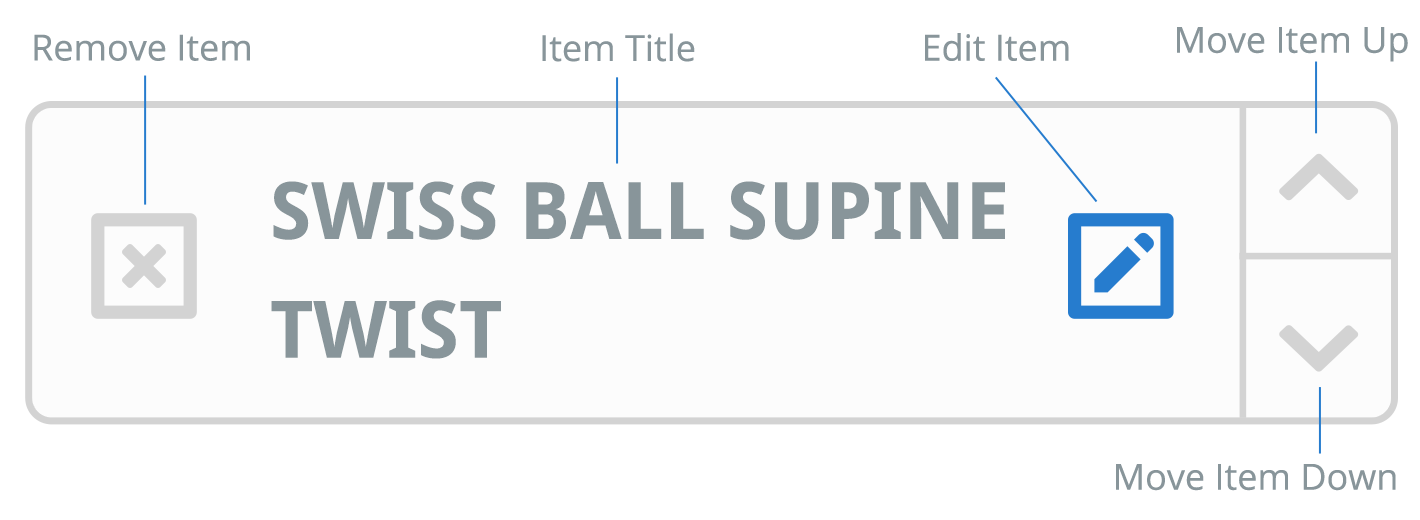
Once the item is added to the PROGRAMME CONTENTS COLUMN, you now have the option of editing the exercises and information sheets to your preference and removing or re-ordering the item in your current programme. To edit your newly added exercises and information sheets, click the blue EDIT ITEM button on the item tile in the PROGRAMME CONTENTS COLUMN (this is the blue pencil icon).

This will open the edit exercise or edit information sheet window, where you can edit the exercise's name, description, sets & repetitions and frequency or the information sheets title, subtitle and four text blocks. You can also replace the images on the exercises and information sheets with your own. Be sure to click the SAVE CHANGES button after you make your changes to each item.
To read more in-depth explanations on editing exercises and information sheets, click the appropriate link below:
HOW-TO-GUIDE: Editing an exercise
HOW-TO-GUIDE: Editing an information sheet
9. Create your new custom programme
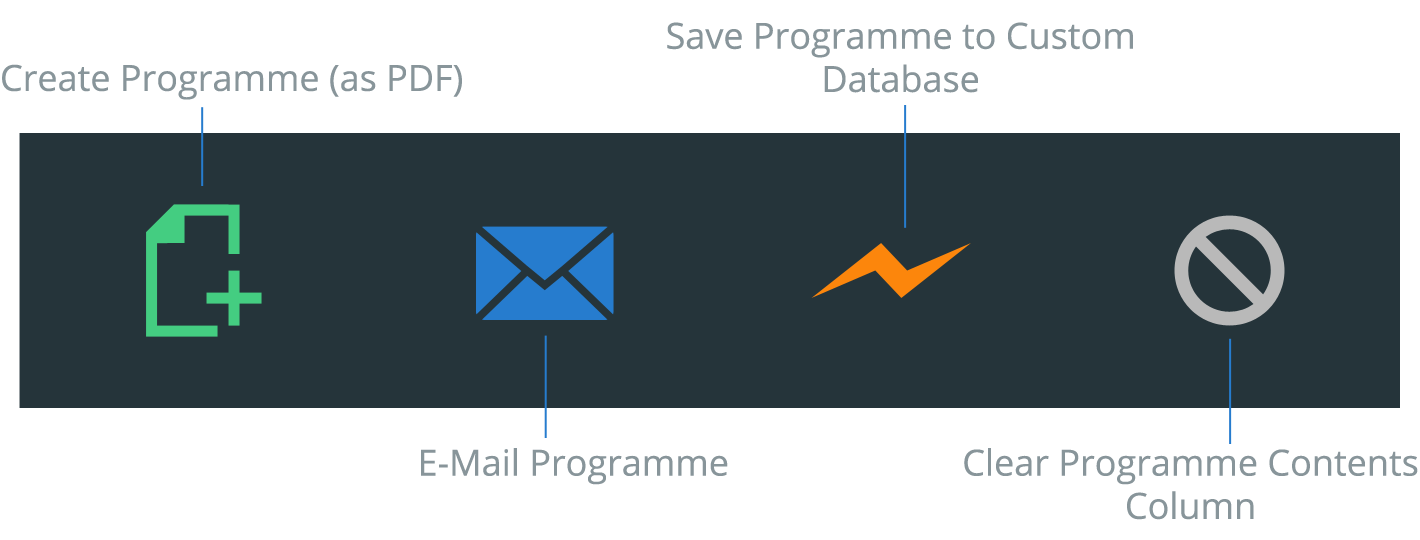
Once you are happy with the changes you have made to your programme, you can now add it to your own database of custom programmes. To do this, click the orange SAVE PROGRAMME TO CUSTOM DATABASE button (the orange lightning bolt icon) at the base of the PROGRAMME CONTENTS column

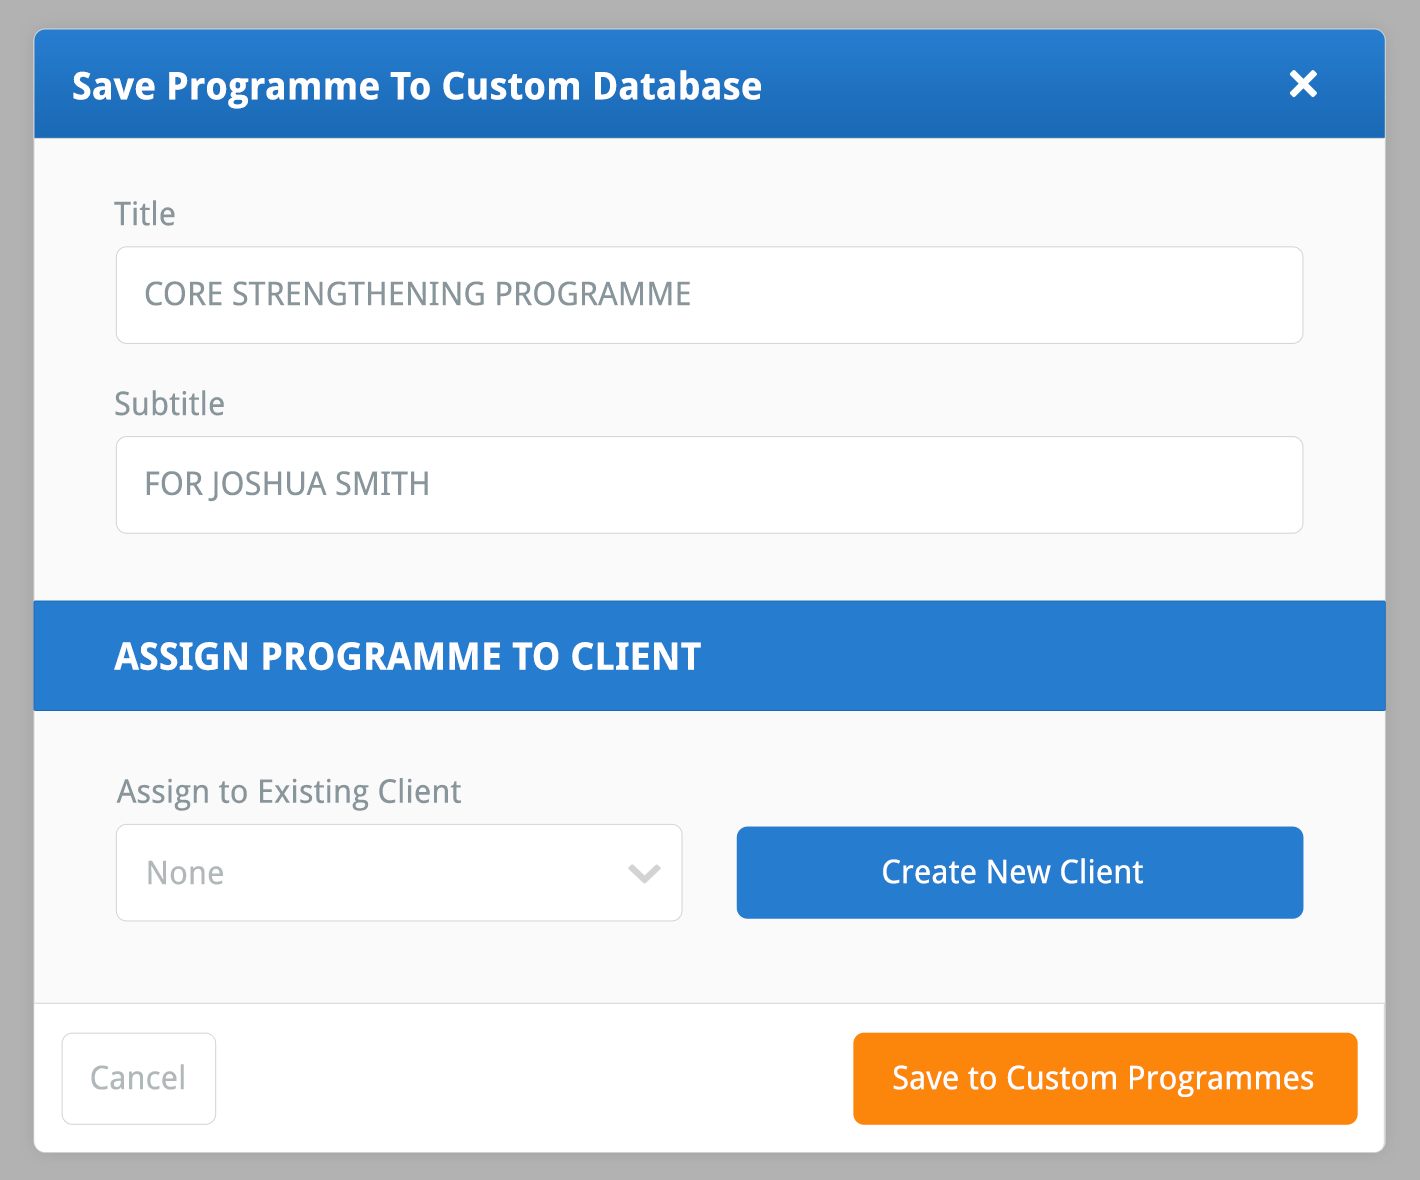
This will open the SAVE PROGRAMME TO CUSTOM DATABASE window where you can give your new custom programme a title and subtitle (these are important as the programme title is used when searching your custom programmes in the future).

You can also assign your new custom programme to a client, by selecting their name from the ASSIGN TO EXISTING CLIENT drop-down menu. This feature allows you to look through the history of past programmes you have assigned to your clients. This can be done from the CLIENTS SECTION. To read more about this feature, view our how-to-guide on ASSIGNING A PROGRAMME TO A CLIENT.
Once you are satisfied with your programme titles (and client assignment) click the orange SAVE PROGRAMME TO CUSTOM DATABASE button button at the bottom of the window.

Your programme has now been added to your custom database. You can read more about custom programmes from the links below:
Editing a custom programme
Deleting a custom programme
Searching for programmes